Velero工具简介
最近刚刚把公司生产环境、预发环境、测试环境和研发环境做了K8s,运维这块需要实现集群应用备份和迁移功能,发现vmware开源的velero对于kubernetes应用以及持久化数据卷备份以及迁移是个不错的选择。
Velero安装
Velero分为服务端和客户端两个部分。
服务端安装
服务端使用的是velero-plugin,velero-plugin的存储有很多选择,官方给了像velero-plugin-for-aws,velero-plugin-for-gcp,velero-plugin-for-microsoft-azure等多种形式,因为公司主要用阿里云,所以选阿里云团队开发的velero-plugin:
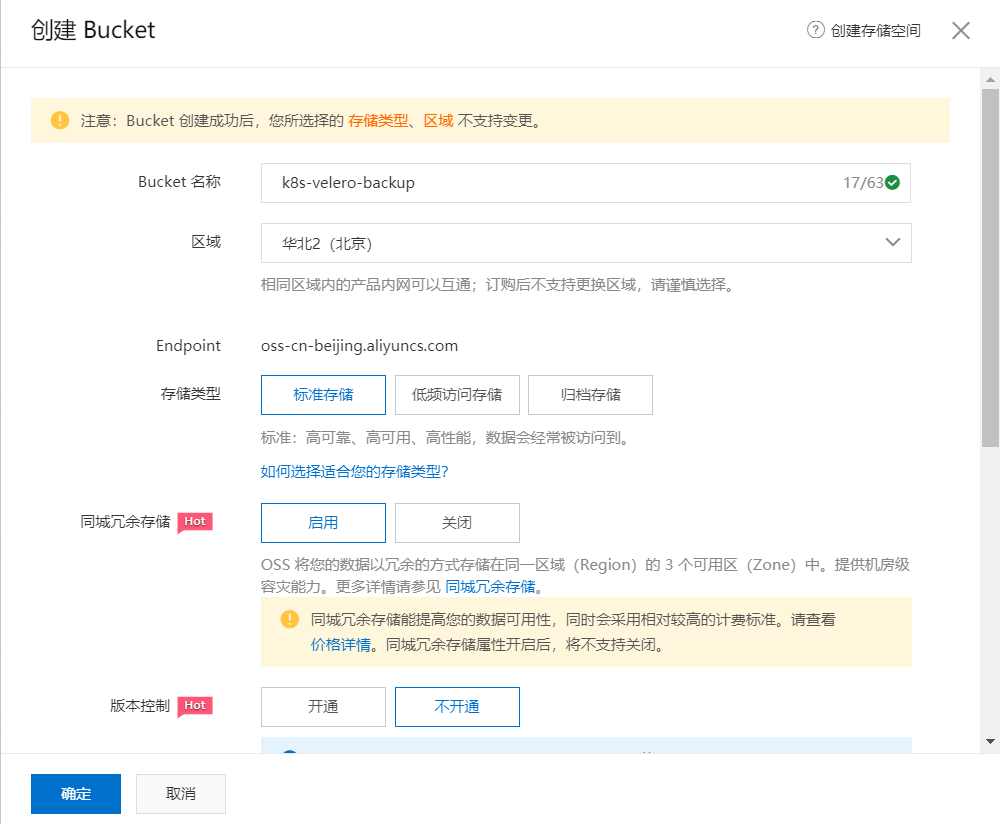
1、在阿里云OSS创建一个BUCKET:

2、设置环境变量,将环境变量赋值到
01-velero.yaml文件:export BUCKET=k8s-velero-backup #这里是创建的BUCKET地址
export REGION=cn-shenzhen #这里是你的OSS endpoint地址
sed -i "s#<BUCKET>#$BUCKET#" install/01-velero.yaml
sed -i "s#<REGION>#$REGION#" install/01-velero.yaml3、创建一个阿里云的RAM用户,赋予权限:
{
    "Version": "1",
    "Statement": [
        {
            "Action": [
                "ecs:DescribeSnapshots",
                "ecs:CreateSnapshot",
                "ecs:DeleteSnapshot",
                "ecs:DescribeDisks",
                "ecs:CreateDisk",
                "ecs:Addtags",
                "oss:PutObject",
                "oss:GetObject",
                "oss:DeleteObject",
                "oss:GetBucket",
                "oss:ListObjects"
            ],
            "Resource": [
                "*"
            ],
            "Effect": "Allow"
        }
    ]
}
4、将
install/credentials-velero文件的密钥修改为:ALIBABA_CLOUD_ACCESS_KEY_ID=<你的ALIBABA_CLOUD_ACCESS_KEY_ID>
ALIBABA_CLOUD_ACCESS_KEY_SECRET=<你的ALIBABA_CLOUD_ACCESS_KEY_SECRET>5、创建velero的相关资源和应用:
kubectl create namespace velero
kubectl create secret generic cloud-credentials --namespace velero --from-file cloud=install/credentials-velero
kubectl apply -f install/00-crds.yaml
kubectl apply -f install/01-velero.yaml
okay,完成了
注:在切换多个集群的时候,出现You must be logged in to the server(unauthorized),是证书错误,有可能是集群名称一样导致用了另一个集群的证书导致,这个错误还是挺常见的。
客户端安装
客户端使用很简单,因为官方直接提供了二进制文件,直接下载解压即可:
- 1、下载阿里云 verlero-plugin
- 2、解压:
tar -xvf <RELEASE-TARBALL-NAME>.tar.gz -C /dir/to/extract/to
使用
备份应用:./velero backup create <备份名称> --include-namespaces <备份的命名空间>
完成备份:

恢复应用:./velero restore create --from-backup <备份名称>
数据卷的备份:./velero backup create <备份名称> --snapshot-volumes --include-namespaces <备份的命名空间>
数据卷的恢复:./velero restore create --from-backup <备份名称> --restore-volumes
